Showing posts with label off the page. Show all posts

12 May 2013

Mother Canvas & Layout

Hey there
 
Firstly, to all those mummy's out there... Happy Mother's day. I'm excited. It's my first. Hope you all have something lovely planned for you and get spoilt by your loved ones.

So this month at Scrapmatts we were challenged to create an Off the page project and a colour challenge. I could not have been happier of timing as I had a sudden urge to create a canvas recently, inspired by a poem that I saw on Facebook. While my daughter is only 5 months old, I love the theme of this poem as it is such an important thing to remember as our children grow. Here is the poem:

Slow down mummy,
there is no need to rush,
slow down mummy,
what is all the fuss?
Slow down mummy,
make yourself a cup of tea.
Slow down mummy,
come and spend some time with me.
Slow down mummy,
let's put our boots on and go out for a walk,
let's kick at piles of leaves,
and smile and laugh and talk.
Slow down mummy,
you look ever so tired,
come sit and snuggle under the duvet and rest with me a while.
Slow down mummy,
those dirty dishes can wait,
slow down mummy,
lets have some fun,
lets bake a cake!
Slow down mummy I know you work a lot,
but sometimes mummy,
its nice when you just stop.
Sit with us a minute
& listen to our day,
spend a cherished moment,
because our childhood is not here to stay!  
Rebekah.Knight (c)2011

And my canvas:
 
It came together in 2 nights. I actually had some old canvases that were printed wrong and replaced so I kept the faulty ones and finally got to put it to use. I painted it all white, then modge podged my A4 photo print and added some texture paste around the edges. I used Tim Holtz distress paint to give some extra texture, in black and overlapped over the edge of the photo a little to blend it. Simple and quick.


The poem was printed on kraft cardstock and stuck down on scrap chipboard to give some height. The mother title was embossed in a sandy/golden colour. And the flowers, well most of them were from a mixed bag I got from a garage sale site from a lovely fellow scrapper.
 
I love how it turned out!! And was happy to see the person has also created a similar daddy version so I am already planning another canvas.
 
 
And now for a layout share - I went with Yellow, black and white for my colour scheme:

I realised as I was uploading it that the chipboard word over happy was lopsided when I photographed. Oops. It was meant to be straight.


Thanks for looking and of course... HAPPY MOTHERS DAY!!


Holly x


14 September 2012

Off The Page with Designer Scrapbooking

Hey there

Can you believe it is finally Friday? It has been a big couple of weeks for me so my weeks feel so long lately but I am looking forward to a quiet weekend. Actually, it will be extremely quiet with the only plans I have being cleaning the house (parts of it...as inspired by the 20 days to clean your house challenge at The Organised Housewife). More on that later. I also plan on doing a bit of baking... some trial runs of things I want to make for my baby shower in a couple of weeks time. Otherwise, a bit of relaxing is in order I think.

So today I want to share a couple of recent OTP projects that I have done as part of my DT role over at Designer Scrapbooking. Suzanne sends such fun projects to work with, giving me the chance to dabble in some OTP since this is an area I love but rarely squeeze in between all the general scrapbooking.

The first project I had to work with was a Twidleybitz Treat Box:

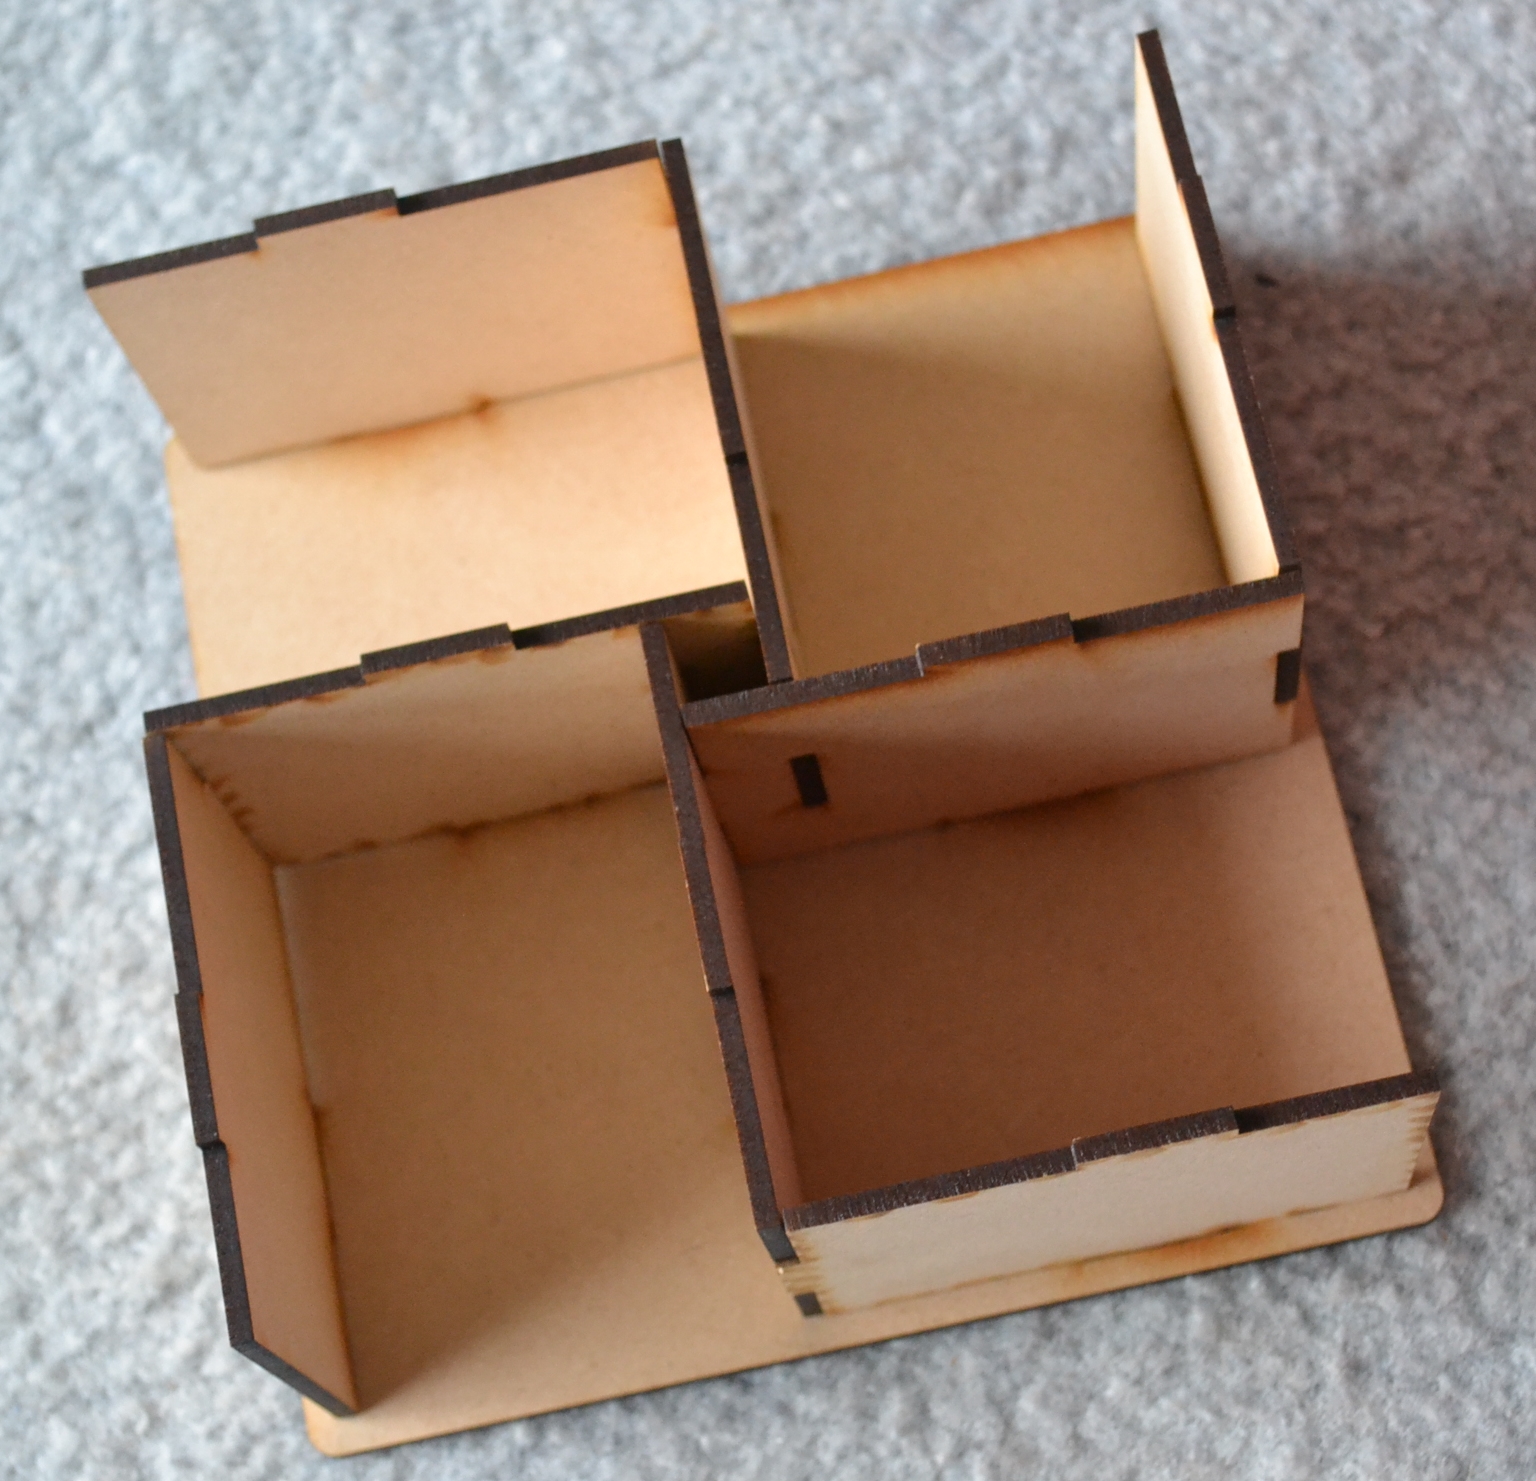
 The treat box comes as flat packed MDF, but this photo above gives an idea of how it looks before you put on the lid. A little tricky to put together but it did not take too long.
 I gave my paper on the top of the box an aged look by inking and distressing the edge and applying a coat of Helmar 2 step crackle paint for something different. The photo does not really show up too well.
 The box comes with lots of lovely chipboard words and shapes to decorate the box with. I heat embossed my words before adhering them to the box.
 The papers used were Kaisercraft and My minds eye, with d-lish scraps embellishments and a Kaiser flourish.


Now for the latest DT project I completed, Suzanne sent me a super cute butterfly MDF blackboard to work with. I can see this is going to end up in my nursery at some point so I decorated it with that in mind.
 I forgot to take a picture of the raw item, however it comes in 2 pieces, the blackboard and the Wood frame. I simply painted the frame in white paint, decorated with some Kaiser Tigerlilly rub ons and d-lish scraps rhinestones, then added some Kaiser collectables butterflies, also from the Tigerlilly collection around the edge. Simple but pretty for a nursery for a little girl :)

 
So with my baby shower coming up in 2 weeks time, and the fact that I decided I wanted to host it here, I have a mega clean up to do. My house is pretty freaking awful right now. I am not the neatest person on the planet. A bit of a hoarder in fact, and emptying the former junk room to create the nursery has definitely caused the rest of the house to suffer even worse. So when I saw the Organised Housewife 20 days to organise your house, I thought what an awesome idea. The only problem is I don't have 20 days in a row to get into it. So I am doing the tasks on my weekends instead. It means I won't get anywhere near all of the steps done before the baby shower, since I have done 2 and it is up to 10, but I will work out the most essential ones for the areas that need to be done by that day and do those first and then work on the rest later for the rooms I can hide on the day.  So far the kitchen has had a big tidy, and the ensuite. Tomorrow I will tackle the laundry probably as its a smaller job, plus the living room perhaps. I dunno. A bit daunting. There is crap everywhere lol
 
Then closer to baby time, I am going to start from the top and work my way through all 20 days in a row step by step, as I have been printing off the daily tasks and planners for future reference.
 
Anyway, its getting late and I have a layout to finish and a comfy bed to climb into. Hope you all have a wonderful weekend planned.
 
Holly x

19 April 2012

Kaiser Photo Box

Hi all,

As you may have seen in a previous post, I recently finished decorating a kaisercraft wooden recipe box to use as a photo box. The recipe boxes are the perfect size for storing photographs you may have printed for potential scrapbooking or even special event photographs. As you will see from my photobox, I have decorated it with wedding photos, so one of these photo boxes would actually make a really wonderful gift for a special occasion, such as a wedding, anniversary or birth of a baby.

Kaiser wood BTP items are so easy to decorate. I tend to use the wooden pieces as stencils for cutting out my patterned papers, tracing them on the reverse side of the paper that I wish to use. The same can be done with photos, making sure they are slighltly bigger than the spaces they will be filling so you can fasten them to the inner wall of the box. Once I have all my papers cut out, I start gluing them on with a good quality craft glue. One that does not bubble or leave wet marks through your paper. You will usually find you have some extra paper hanging over the edges once you cut this off. The best way to smooth out these edges is to sand them away. I actually use a chisel to do this as its really quick and easy but normal sand paper or blocks do the job too.

After I have sanded my edges, in this particular case I wanted an aged look to my photo box so I went around the edges using some distressed 'vintage photo' ink by Tim Holtz using an ink block. You can do this as faintly or as dark as you wish to get the look you want.

Then it's a matter of putting your box together. Once all the pieces are fitting nicely together, use some strong glue such as Mod podge or Kaiser wood glue to hold your box together. This is a gradual process as you may need to hold your pieces in place for a while or have them weighted while they dry.

Then it is simply a matter of embellishing the box as you please. I used rub ons, flowers, a doily and bling to decorate my box, and a layer of buttons to create a pretty vintage handle to open the box. The pearl strings are actually vintage also, given to me by my mother in law as left overs from when she made her wedding head piece.

So now I have a lovely photo box to store photos ready for scrapping and the great thing is, these boxes come with dividers so you can divide your photos into themes to save time for your next scrapping project.

I am excited that the Kaiser DT call for 2012-2013 has been announced. Fingers crossed but there is so much amazing talent who will be in the running.

Have a great day everyone.

Holly x

30 December 2011

Top 10 of 2011

Howdy,

Wow, I cannot believe 2011 is almost done and dusted. And not soon enough if you ask me. It was quite a challenging year at times for me so far from my favourite. However I am proud of my achievements regards to my scrapbooking. I started the year as a complete and utter newbie, dabbling here and there over the years in some totally flat, dimensionless scrap pages. Then I discovered challenge blogs and found so many wonderful and inspirational scrappy friends. I somehow managed to get on some design teams (thanks to those lovely people who were willing to take me on) and my scrapbooking skills improved 1000%. Still a long way to go compared to those I have come to admire, however like any new skill... it takes practice and I've been having lots of it!

So I thought I would take this opportunity to share 10 of my favourite layouts of 2011. It can be hard to narrow it down and there are a couple of favourites I am not allowed to share due to acceptances from Scrapbooking Memories (Wow... another thing that still amazes me) and a couple of very recent creations for DT purposes, so here are 10 favourites that I am allowed to share:


Even in this collection of layouts,  you can see the development of my style over the space of a year.

I also wanted to share my top 6 OTP projects:


Don't forget there is still time to enter my blog candy for my blog anniversary. The anniversary is 5.1.12 but the draw will come late in January. Click here to enter. You could win this:

Wishing you all a happy and save new years eve. Bring on 2012!

Holly xo

19 November 2011

Stocking Garland

Hi Everyone,

This year I am getting organised a bit early with the festivities of christmas and so I have started creating some new OTP decorational items for the house for the christmas period. This stocking garland was actually part of the awesome christmas themed DT pack from Scrapbooking Haven and I loved making it. It came together so quickly and easily.


Materials: Kaisercraft: BTP stocking garland, Be merry papers, chipboard, rub on and mini pad; RW lasercuts chipboard title; Everlasting keepsakes chipboard bookplates; Tim holtz distress inks; other: paper doily, organza ribbon.

20 September 2011

Hi everyone,
Below is my latest blog post over at Alterd Project Inc. I'm a bit late this week, but not as late as this item is.  My nephew turned 6 in August and I have been meaning to get this done since then but with an overseas trip and extreme work stress, I've only just finished it. Slack, I know! We are in different states too so that means another couple of days to get this posted down to him.

I wanted to make him something functional yet decorative for his room and love the Kaisercraft Party Animals collection. Teamed up with their train tidy, its a great fun item for any kids room.


The kaiser wood items come as flat packed raw MDF so you need a good file to get rid of unwanted tabs from the edges. I then painted the pieces in the colours I wanted, but be mindful that the wood will swell so you may need to further sand down some parts to put it back together. I then cut out pieces of paper from the Party animals collection and decorated the train accordingly. I have used a couple of kaiser wood shapes also for extra dimension and some droplets. The train sections are linked together with some album rings.

This is a great project for a kids room, to store items such as pencils, small toys or other bits and pieces. It would also be great made up in christmas colours so that you can put lollies or other goodies in there and place it on the table for a decoration.

Have a great week.

Holly xo

15 August 2011

Wedding Frame

Hi everyone,
I just got back from a trip to Auckland yesterday so haven't been home to do much scrapping or sharing in the past week. Most of my scrapping has been for DT committments too, however I have just posted up my latest altered project over at Altered Project Inc, which you can find here.

Here is a photo of the finished item:
 And some close ups.


The frame was created for my mother in laws birthday last week. She loved it but it was a bit annoying when DH said 'Here is something Holly just whipped up for you', like it took me 5 minutes. Men! Pfft LOL It was the only gift she got from any of the family that day so she definitely appreciated it. Oh and it did not help that she had to cook half her birthday dinner and then her husband accident spilt his beer all over her plate mid dinner. Thankfully after a few seconds of smoke coming out her ears, we were all able to laugh at the rediculous situation. Got to love dinner with the in laws!

Hope you're all having a fabulous week :-)